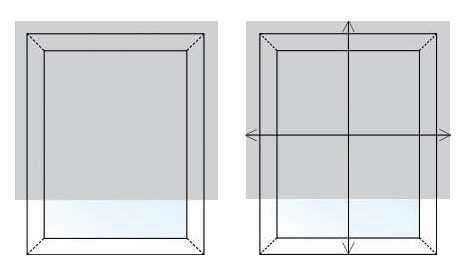
Not sure you’re so great at this? We have a team of absolute pros who can walk you through it.
Customers can call 602-501-1468, email help@modernshadexpress.com,
or chat on-site with us.
OPTION 1 -- OUTSIDE MOUNT
(OUR TEAM OF PROS STRONGLY SUGGEST THIS ONE)
With this option, your shade will be mounted directly above your window opening. It will go past the window opening a 3 inches on each side and hang below the opening 3 inches.
PROS:
- Measurements can be less than perfect without being noticed or creating any functional issues.
- Since shade is wider than the window opening it will ensure good fabric coverage.
- This will help hide window framing and drywall imperfections
CONS:
- This option takes up more space. Total projection of MSX ONE and MSX Blade shade is approximately 3 and 1/8th inches.

HOW TO MEASURE:
It's really this simple: Measure the width and height of your window opening.
Add 6" to the height and 6" to the width.
Enter those measurements when building your shade order and select "Outside Mount".
If you are measuring several windows it may be helpful to download and use our MSX Easy Measure Sheet. Our measure sheets will make building your order a breeze!
GOT YOUR MEASUREMENTS?
LET'S BUILD YOUR ORDER!OPTION 2 -- INSIDE MOUNT
(THIS MOUNTING OPTION IS A LITTLE BIT MORE CHALLENGING TO MEASURE FOR. KEEP IN MIND LIGHT GAPS AND THE PREVALENCE OF UNEVEN DRYWALL AND WINDOW FRAMES.)
With this option, your shade will be mounted within the window opening itself. You will also likely need to select the option for “Ceiling Mount” while building your inside mount shade since it is unlikely you will have 2 and ½ inches of window framing to mount directly onto. Also, you will need at least 1” of window framing all around the window to ensure that the fabric will cover all of the glass since there is always a gap between the end of the shade hardware and where the fabric begins. Please also not that there will be an open gap of roughly an inch between the roll and the mounting plate when mounting to the top of the window opening.

PROS:
- This space covers up less of your wall and won’t project as much into the living space.
CONS:
- The margin for error is very, very small. Your width measurements must be exact or you’ll be making a return.
- Shade must be hung close to level. This means you may need to shim one side of your shade if your window opening is far out of level.
- A perfectly square shade hanging inside a not so square window is not pretty.
- You will likely need to Ceiling Mount and this will leave a gap at the top of the window
HOW TO MEASURE:
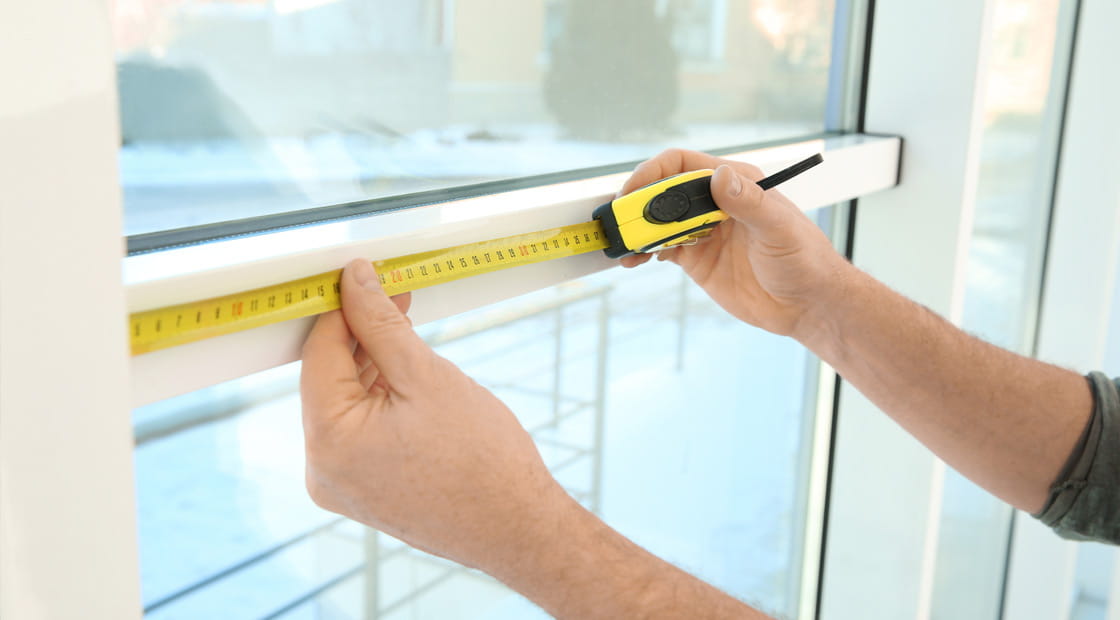
You'll want to make sure your width measurement is precise: Measure the exact width of your window opening at the top of the window where the shade will be mounted. Enter that width when ordering your shade.
The height does not need to be as precise: Measure the height of your window opening.
Enter these exact measurements while building your shade and select inside mount.
GOT YOUR MEASUREMENTS?
LET'S BUILD YOUR ORDER!Installation Instructions
PARTS LIST
- MSX SHADE INSTALLATION TEMPLATE
- INSTALLATION BRACKETS
- ASSORTED SCREWS FOR VARIOUS WALL APPLICATIONS
- MINI LEVEL
- MINIATURE PENCIL (MARKING)
- SHADE
INCLUDED IN PACKAGE
NOTE: RECOMMENDED TOOLS FOR INSTALLATION - POWERED DRILL OR SCREW DRIVER.

1 Remove shade to reveal template. Remove adhesive and place template exactly where shade will be mounted. NOTE: Locate “Master” box and remove level for use. Using supplied level, ensure template is properly leveled. Once template is leveled, use preset holes on template to mark screw locations for brackets. Once complete, gently remove template.

Locate hardware bag and remove brackets from packaging. Select proper fasteners for your application. Place brackets over marked screw location.
NOTE: Ensure that bracket is placed in the proper orientation (see image below) Ensure
that screw is placed in center of bracket screw opening and proceed to fasten bracket until a snug fitment.
2

3
MOUNTING YOUR MSX SHADE
Remove protective wrapping from shade (HINT: Wash hands to avoid soiling fabric from oils and dirt.) Ensure proper orientation of shade (see image below)

Proceed to mount shade by inserting bottom channel of mounting profile into lower lip of ALL installation brackets at an angle (see image below)

Once the lower lip of all brackets has been inserted into channel, rotate mounting profile forward into the bracket cradle until you hear a prominent click sound from all the brackets. NOTE: Be sure to visually inspect that cradle teeth are completely over the mounting profile ridge. SEE IMAGE BELOW.


FINISHING TOUCHES
Once installed, shade can be centered by gently tapping in either direction IF TWIN PULL: Bottom limit can be adjusted by rotating the adjustment wheel located opposite of the controls.
IF MOTORIZED: See instruction sheet for adjusting top and bottom limits.

In need of Assistance?
Customer Service
Monday-Friday, 8am-4p (MST)
Tel. 602-501-1468
Contact Us
www.modernshadexpress.com
info@modernshadexpress.com
17255 N 82nd St, Suite 110
Scottsdale, AZ 85255